Tuesday, October 31, 2023

Exploring NDepend v2023.2: Unraveling the Latest Features

Introduction:

For .NET developers and software quality enthusiasts, NDepend is an indispensable tool. NDepend v2023.2 introduces an array of new features that promise to streamline your development process and enhance the quality of your code. In this comprehensive article, we’ll delve into the latest updates and enhancements.

Full .NET 8.0 Support:

  • With .NET 8.0’s release, NDepend ensures seamless compatibility.
  • Analyze .NET 8 code quickly, covering project types like ASP.NET Core, Windows Desktop, Blazor, and Console applications.
  • Your .NET 8.0 projects are now within NDepend’s scope for analysis.

C# 12 Support and Parsing Improvements:

  • NDepend v2023.2 embraces the new features of C# 12, including primary constructors for classes and inline arrays.
  • Achieve 100% resolution of code element declarations in your source code, from fields and enumeration values to abstract methods and more.
  • Source declaration line enhancements clarify your code, making issue identification more straightforward.

Performance Enhancements:

  • Say hello to a faster analysis process. NDepend v2023.2 reduces report generation time by a staggering 40%.
  • Even for extensive code bases with thousands of source files and millions of lines of code, report generation is now a matter of seconds.
  • NDependReport.html file sizes are halved thanks to new optimizations, ranging from one to 5MB. Sharing and usability have never been more convenient.

UI Enhancements:

  • The user interface receives significant improvements.
  • Loading code base snapshots with the baseline snapshot is now parallelized, resulting in a 40% reduction in loading time.
  • Lazy initialization of panels makes the UI instantly responsive once snapshots are loaded.
  • In Project Properties, the “Code to Analyze” panel now resolves all assemblies 41% faster.

    NDepend Dashboard
    Dashboard

    NDepend Report Dashboard
    NDepend Report Dashboard

    NDepend_2023_Report_Abstractness versus Instability Diagram
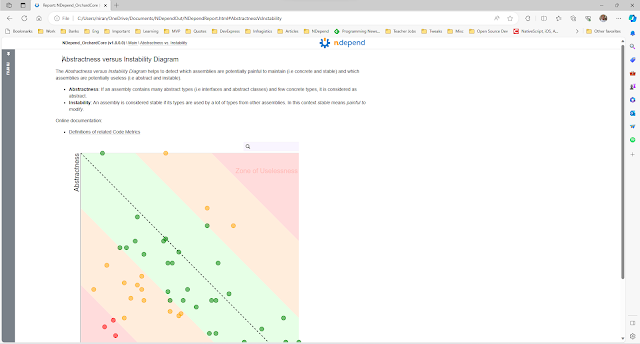
    NDepend Report - Abstractness versus Instability Diagram

Customizable Issue Explanations:

  • NDepend v2023.2 empowers users to define patterns for issue explanations.
  • This customization enables tailored issue explanations to meet specific project needs, enhancing insights into the codebase.
  • Issue explanations are integrated into the NDepend UI and source code views in reports, providing an in-depth understanding. NDepend_2023_Report_Issues Improvement

Fewer False Positives:

  • Reducing false positives remains a top priority for NDepend.
  • In this release, various rules have been refined to minimize false positive issues, allowing developers to focus on genuine code quality concerns.

Conclusion: NDepend v2023.2 emerges as a powerhouse tool for .NET developers. With complete .NET 8.0 support, compatibility with C# 12, and substantial performance enhancements, it becomes a valuable asset for your toolkit. The UI improvements and customizable issue explanations elevate the code analysis experience. Bid farewell to false positives and embrace an accurate analysis.

In a world where software quality is non-negotiable, NDepend v2023.2 is the tool you need to ensure your .NET projects shine.

Final Thoughts: NDepend v2023.2 continues its commitment to delivering an exceptional code analysis experience. Its ability to adapt to the latest .NET technologies and enhanced performance makes it a crucial tool for any .NET developer. Dive into NDepend v2023.2 and watch your codebase reach new heights of quality and maintainability.

Monday, October 2, 2023

Securing .NET Web Applications with Authentication: Harnessing the Power of Social Media Provider Authentication

Introduction:

In today's interconnected world, users expect a seamless and secure login experience on websites and applications. Social media provider authentication, such as Google Authentication, offers a convenient and trusted way for users to access your application using their existing social media accounts. In this tutorial, we'll explore how to integrate Google Authentication into your ASP.NET Core application step by step.

Prerequisites:

Before we dive into the implementation, make sure you have the following:

  1. Visual Studio or Visual Studio Code installed on your system.
  2. An ASP.NET Core web application project was created.

Step 1: Install the Required NuGet Package

The first step is to install the Microsoft.AspNetCore.Authentication.Google NuGet package into your ASP.NET Core project. This package provides the necessary tools for integrating Google Authentication.

Open the NuGet Package Manager in Visual Studio, search for Microsoft.AspNetCore.Authentication.Google, and install the latest stable version.

Install-Package Microsoft.AspNetCore.Authentication.Google

Step 2: Configure Google Authentication

To enable Google Authentication in your application, you need to set up the necessary credentials on the Google Developer Console. Follow these steps:

  1. Navigate to the Google Developer Console.

  2. Create a new project or select an existing one.


  3. Set up the consent screen by providing the required information, including the application name, support email, and domain.


  4. Add authorized JavaScript origins and redirect URIs for your application. Make sure to include both the development and production URLs.

  5. Under the "Scopes" section, add the necessary scopes, such as emailprofile, and openid.


  6. Save your changes and publish the app.

  7. Create OAuth 2.0 credentials by going to "Credentials" and selecting "Create credentials" > "OAuth client ID." Choose the application type as "Web application" and configure the redirect URIs.

  8. After creating the OAuth client ID, note down the "Client ID" and "Client Secret" values.


Step 3: Configure Your ASP.NET Core Application

Now, let's configure your ASP.NET Core application to use Google Authentication. Open your appsettings.json file and add the Google Authentication settings:

{
  "Authentication": {
    "Google": {
      "ClientId": "YOUR_CLIENT_ID",
      "ClientSecret": "YOUR_CLIENT_SECRET"
    }
  },
  // Other application settings...
}

Replace "YOUR_CLIENT_ID" and "YOUR_CLIENT_SECRET" with the values you obtained from the Google Developer Console.

Step 4: Enable Google Authentication in Your App

In your ASP.NET Core application, navigate to the Program.cs file. Inside the CreateHostBuilder method, add the following code to enable Google Authentication:

builder.Services.AddAuthentication()
    .AddGoogle(options =>
    {
        options.ClientId = Configuration["Authentication:Google:ClientId"];
        options.ClientSecret = Configuration["Authentication:Google:ClientSecret"];
    });

This code configures the authentication services to use Google Authentication and sets the client ID and client secret from your appsettings.json file.

Step 5: Run Your Application

With Google Authentication configured, you can start your ASP.NET Core application. You should now see the "Use other services to log in" option on your login page, with Google as one of the available choices.

Click the "Google" button, and a popup will appear, prompting you to sign in with your Google account. After signing in, you'll be redirected back to your application, logged in, and authenticated via Google.

Conclusion:

Integrating Google Authentication into your ASP.NET Core application provides users with a convenient and secure way to access your services without creating additional accounts. This enhances the user experience and can boost user engagement on your platform.

Tuesday, September 12, 2023

Unblocking Angular CLI: Resolving the PS1 Error in PowerShell


Introduction

When working with Angular CLI (Command Line Interface) and PowerShell on Windows, you may encounter an error message that says, “PS1 cannot be loaded because running scripts is disabled on this system.” This error typically occurs due to the security settings on your system that prevent the execution of PowerShell scripts. However, you must continue using Angular CLI effectively. This guide will walk you through the steps to fix this error and get back to your Angular development workflow.

Understanding the Error

Your error message is related to PowerShell’s script execution policy. PowerShell has different execution policies determining whether scripts can be run and under what conditions. The default execution policy on many Windows systems is often set to “Restricted,” which prevents the execution of scripts, including Angular CLI scripts.

PS E:\DevWorkspaces\GitHub\niranjankala\ms-learn\src\dotnet-core\Summaries> ng -v
ng : File C:\Users\niran\AppData\Roaming\npm\ng.ps1 cannot be loaded. The file C:\Users\niran\AppData\Roaming\npm\ng.ps1 is not digitally signed. You cannot run this script on the current system. For 
more information about running scripts and setting execution policy, see about_Execution_Policies at https:/go.microsoft.com/fwlink/?LinkID=135170.
At line:1 char:1
+ ng -v
+ ~~
    + CategoryInfo          : SecurityError: (:) [], PSSecurityException
    + FullyQualifiedErrorId : UnauthorizedAccess

How To Fix Error “PS1 Can Not Be Loaded Because Running Scripts Is Disabled On This System” In Angular

When working with Angular CLI (Command Line Interface) and PowerShell on Windows, you may encounter an error message that says, “PS1 cannot be loaded because running scripts is disabled on this system.” This error typically occurs due to the security settings on your system that prevent the execution of PowerShell scripts. However, resolving this issue is essential to continue using Angular CLI effectively. This guide will walk you through the steps to fix this error and get back to your Angular development workflow.

Understanding the Error

Your error message is related to PowerShell’s script execution policy. PowerShell has different execution policies determining whether scripts can be run and under what conditions. The default execution policy on many Windows systems is often set to “Restricted,” which prevents the execution of scripts, including Angular CLI scripts.

Solution: Change the Execution Policy

To resolve this issue, you must change the PowerShell execution policy to allow script execution. Here are the steps to do that:

  1. Open PowerShell as an Administrator:
    • Click on the Windows Start button.
    • Search for “PowerShell.”
    • Right-click on “Windows PowerShell” or “PowerShell” (depending on your Windows version) and select “Run as administrator.”
  2. Check the Current Execution Policy:
    • In the PowerShell window, type the following command and press Enter:
      Get-ExecutionPolicy
      
    • This command will display the current execution policy. If it’s set to “Restricted,” you need to change it.
  3. Change the Execution Policy:
    • To change the execution policy, you can use the following command:
      Set-ExecutionPolicy RemoteSigned
      

      The “RemoteSigned” policy allows the execution of locally created scripts that require a digital signature for scripts downloaded from the internet.

    • You might be prompted to confirm the change. Type “Y” for Yes and press Enter.
  4. Verify the New Execution Policy:
    • To ensure that the execution policy has been changed successfully, run the following command:
      Get-ExecutionPolicy
      

      It should now display “RemoteSigned.”

  5. Restart PowerShell:
    • Close the PowerShell window and open a new one for the changes to take effect.
  6. Run Your Angular CLI Command:
    • Now that you’ve allowed script execution, you should be able to run Angular CLI commands without encountering the “PS1 cannot be loaded” error.


Caution

Changing the execution policy to “RemoteSigned” makes your system more permissive with regard to script execution. While this change is necessary for running Angular CLI commands, it’s essential to be cautious when running scripts from untrusted sources. Ensure you run scripts from reliable and trusted locations to minimize security risks.

Conclusion

By changing the PowerShell execution policy to “RemoteSigned,” you can resolve the “PS1 cannot be loaded” error and continue using Angular CLI without issues. However, remember to exercise caution when executing scripts and only run scripts from trusted sources to maintain the security of your system. With this error resolved, you can smoothly work on your Angular projects using PowerShell.

Monday, July 31, 2023

How to Fix ORA-01489: Result of String Concatenation is Too Long with LISTAGG Function


Introduction

Oracle Database is a powerful relational database management system offering developers and database administrators various functionalities. One of these powerful features is the LISTAGG function, which allows you to aggregate rows of data into a single concatenated string. However, when using the LISTAGG function with large datasets, you may encounter an error message like “ORA-01489: result of string concatenation is too long.” In this article, we will explore the causes of this error and discuss various methods to prevent and handle it effectively.

Understanding the ORA-01489 Error

The ORA-01489 error occurs when the result of concatenating strings with the LISTAGG function exceeds the maximum allowed length for a string in Oracle, which is 4000 characters for non-CLOB data types in most environments. When the concatenated string surpasses this limit, the error is triggered, and the query fails to execute.

Solutions to Prevent ORA-01489 Error

1. Truncate the Result with ON OVERFLOW TRUNCATE:

Starting from Oracle 19c, you can use the ON OVERFLOW TRUNCATE clause with the LISTAGG function. This option truncates the concatenated string to fit within the maximum string length allowed.

SELECT 
    LISTAGG(column, delimiter) WITHIN GROUP (ORDER BY column) ON OVERFLOW TRUNCATE AS concatenated_result
FROM 
    table_name;

Please be careful when using this approach since it may lead to data loss if the truncated portion contains essential information.

2. Filter Data to Reduce Concatenation Size:

If the error occurs due to a large number of rows being concatenated, consider filtering the data before using the LISTAGG function. Reducing the number of rows in the result set can help keep the concatenated string within the allowed length.

SELECT 
    LISTAGG(column, delimiter) WITHIN GROUP (ORDER BY column) AS concatenated_result
FROM 
    table_name
WHERE 
    /* Add appropriate conditions to filter data */
    condition;

3. Use CLOB Data Type for Concatenation:

If the concatenated result is expected to exceed the maximum allowed length for a non-CLOB data type, you can use the CLOB data type to store the result. CLOB can handle much larger strings, making it suitable for situations requiring extensive concatenation.

SELECT 
    TO_CLOB(LISTAGG(column, delimiter) WITHIN GROUP (ORDER BY column)) AS concatenated_clob
FROM 
    table_name;

Please note that CLOB data type has its limitations, and you should ensure it aligns with your database configuration.

4. Partition the Data:

If possible, partition the data and perform concatenation on smaller subsets. You can then combine the results of each subset to get the final concatenated string.

SELECT 
    LISTAGG(column, delimiter) WITHIN GROUP (ORDER BY column) AS concatenated_result
FROM 
    (
        /* Subquery 1: Concatenate first partition */
        SELECT column FROM table_name PARTITION (partition_name_1)
        UNION ALL
        /* Subquery 2: Concatenate second partition */
        SELECT column FROM table_name PARTITION (partition_name_2)
        /* Add more subqueries as needed for other partitions */
    );

5. Use XMLAGG and LISTAGG Combination:

Another approach to overcome the ORA-01489 error is using XMLAGG in combination with LISTAGG. The XMLAGG function helps avoid the string length limitation by aggregating data into XML elements before concatenation.

SELECT 
    RTRIM(
        XMLAGG(XMLELEMENT(e, column || delimiter) ORDER BY column).EXTRACT('//text()'),
        delimiter
    ) AS concatenated_result
FROM 
    table_name;

6. Limit the Concatenation Length:

If you don’t want to truncate the result or use CLOB, you can limit the maximum length of the concatenated string to a specific value using the SUBSTR function.

SELECT 
    SUBSTR(LISTAGG(column, delimiter) WITHIN GROUP (ORDER BY column), 1, max_length) AS concatenated_result
FROM 
    table_name;

In this example, max_length should be the maximum allowed length for the concatenated string.

Conclusion

The LISTAGG function in Oracle Database is valuable for aggregating data into a single concatenated string. However, if the result exceeds the maximum string length allowed, the ORA-01489 error may occur when dealing with large datasets. Applying one or a combination of the solutions provided in this article can effectively handle and prevent the ORA-01489 error, allowing you to manage and manipulate large datasets without encountering string concatenation length limitations. You can choose the solution that best fits your specific use case and database configuration to ensure efficient and error-free data aggregation.