Thoughts on C#, .NET, programming, software development and productivity. Tips and tricks to solve various programming problems.
Sunday, June 7, 2020
NDepend - Dependency Graph Navigating Coupling Graph
Saturday, May 23, 2020
NDepend - Improved Dependency Graph Feature
- Group-By Assemblies, Namespaces, Types, Clusters Filters to show or hide
- Box size proportional to element size, Edge width proportional to the coupling strength
- Color conventions instantly identify caller/callee elements
- Complex graph simplified with Clusters
- Export to SVG vector format or PNG bitmap format.
Filter and select the project that you want to analyze.
Thursday, January 24, 2019
How to enable docker support ASP.NET applications in Visual Studio
Introduction
In this article, you will know that how to enable docker support for ASP.NET application in Visual Studio. We will create an ASP.NET Core application docker support and also enable docker support in an existing application.
Prerequisites
- Docker for Windows
- Visual Studio 2017 or later with the .NET Core cross-platform development workload
Enable Docker support in a new application
You can get Docker support in your project when you create a Visual Studio web project, either. NET Core or the full framework. If you choose the .NET Core framework, you get the option to add Docker support in the new project wizard but for the full framework, we can add Docker support later context menu “Solution Explorer”. See below steps to create a .NET Core project with Linux container support:
Docker tools in Visual Studio understand the difference between. NET Core and the. NET full framework so the generated files will nicely reflect those different targeted platforms.
To add Docker support for the full framework, go through previous post - Containerizing a .NET application
Enable Docker support in a new application
You add Docker support after creating a project is by right-clicking the project in the “Solution Explorer” and then select “Docker Support” option under the Add submenu.
Visual Studio will add DockerFile and .dockerignore to the project that will be used to build a docker container image starts with a reference to the base image dotnet:2.2-aspnetcore-runtime.
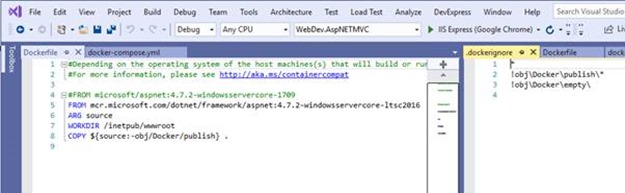
Note: To build this container, you need to switch the Docker tools for Windows on your machine to run Linux containers. If it is targeting to different operating system type, then you would get errors during the build since you can't mix Linux containers with Windows containers.
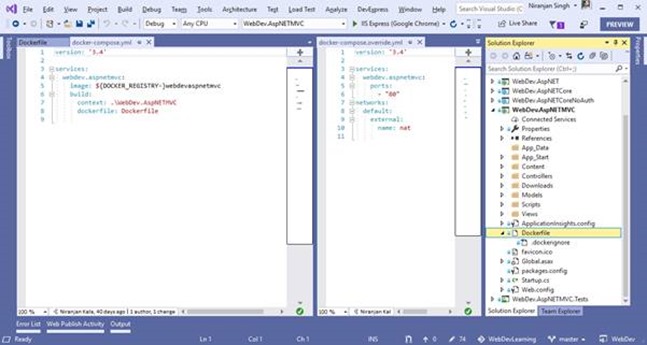
Docker support also added the generated YAML files. YAML files can be used together with docker-compose to execute Docker commands to a set of containers instead of only one at a time so that multiple container can work together for the microservices scenarios.
docker build -f "D:\DevWorkSpaces\GitHub\WebDevLearning\WebDev\WebDev.Containerized.MVCWeb\Dockerfile" -t webdevcontainerizedmvcweb:dev
Build Docker image from CLI
Open command prompt in administrative mode and run the below command in project folder:
C:\Users\niranjansingh\Source\Repos\WebDevLearning\WebDev\WebDev.AspNETMVC>docker build .
Running application under Docker Environment
For .NET Core framework applications, Just run the application by selecting the Docker option just after the Run arrow button. After that application will build and create Docker image according to the settings provided in the DockerFile.
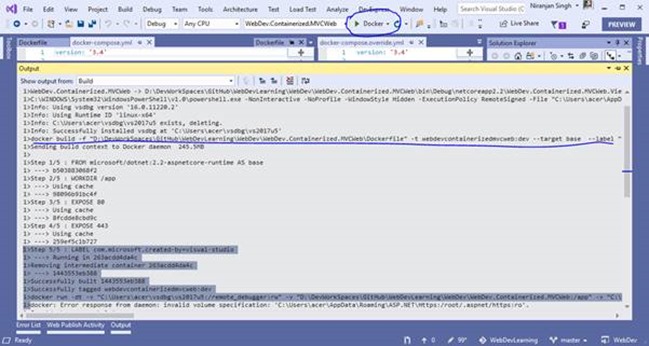
For my case application is targeting “Linux” and Docker for Windows on my system is configured to run the Windows contains so it will not build my case. So, remember to switch particular target Operating system containers before you build the application.
For a .NET framework application, make docker-compose as startup project. After this modify the .yml files to build and run the contains.
You will see Docker Compose button on the place of “Docker” in .NET full framework applications.
Click on Debug button to let the docker decompose to build and run the docker image on the bases of yml file configuration.
Wednesday, January 16, 2019
How to use Angular Lifecycle hooks
- Create
- Render
- Create/Render child components
- Process Changes
- Destroy
Angular creates the component then renders it. After that it get the creates and renders its child components. If there are any changes in component’s data bound properties then processes changes and at last destroys it before removing its template from the DOM.
Angular provides a set of lifecycle hooks and below are few of them:
- OnInit – it is used to perform component initialization and it is used to perform any component initialization after Angular has initialized the data bound properties. It is a good place to retrieve the data for the template from a back-end service.
- OnChanges - It is used to perform any action after Angular sets data bound input properties.
- OnDestroy – This lifecycle hook to perform any clean-up before Angular destroys the component.
Using Angular Lifecycle Hooks
To use a lifecycle hook, you have to follow the below steps:Implement the lifecycle hook interface
Angular provides several interfaces you can implement, including one interface for each lifecycle hook. For example, the interface for the OnInit lifecycle hook is OnInit.export ProductListComponent implements OnInit {
Import Lifecycle hook from Angular packages
You have to import the lifecycle hook interface. Include OnInit in the import statement with Component as belowimport { Component, OnInit } from '@angular/core';
Implement lifecycle hook method
After that you have to implement lifecycle hook method. Lifecycle hook interface defines one method which has name prefixed with ng with interface name. For example, the OnInit interface hook method is named ngOnInit.ngOnInit() { // Some code here }
Complete component declaration:
import { Component, OnInit } from '@angular/core';
@Component({
selector: 'pm-products',
templateUrl: './product-list.component.html',
styleUrls:['./product-list.component.css']
})
export class ProductListComponent implements
{
constructor() { }
ngOnInit() { }
}
In this you can use another Angular Lifecycle hooks to implement required functionality at particular event.Tuesday, December 18, 2018
Create a simple HelloWorld application with NativeScript
NativeScript is a framework that let you to build cross-platform, native iOS and Android apps without web views. Use Angular, TypeScript or modern JavaScript to get truly native UI and performance while reusing the skills and the code from your web projects. Get 100% access to native APIs via JavaScript and reuse of packages from npm, CocoaPods and Gradle. Open source project maintained by Progress.
Getting Started With NativeScript
To get start with NativeScript, It require setup NativeScript CLI on your system. There are two way to setup NativeScript CLI, Quick Setup and Full Setup. Go through the System Requirements and CLI Setup documentation of NativeScript to set up your system.
Information Source - Set Up Your System
I am on a Widows 10 machine so I followed the Full Setup approach and followed below setup install all prerequisites to start with NativeScript:
- Open command prompt as an administrator on you system.
- copy and paste the script below into your command prompt and press Enter:
@powershell -NoProfile -ExecutionPolicy Bypass -Command "iex ((new-object net.webclient).DownloadString('https://www.nativescript.org/setup/win'))"
After the installation, your system will have following tools available:
- The latest stable official release of Node.js (LTS)
- Google Chrome
- JDK 8
- Android SDK
- Android Support Repository
- Google Repository
- Android SDK Build-tools 28.0.3 or a later stable official release
- Android Studio
- Set up Android virtual devices to expand your testing options
Creating first program using NativeScript
tns create HelloWorld --template https://github.com/NativeScripting/template-ng-getting-started-hello
Now open project in the Visual Studio code using below command:
cd HelloWorld
code .
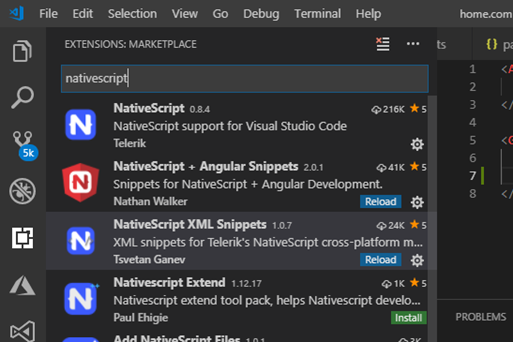
It will open the project in the Visual Studio Code. Now you can edit the project file and also can add some plugin for NativeScript Angular snippets.
Running the Application
If you do not required libraries in the project folder then use “npm install” command to download the dependencies.
You can now bundle your project by passing --bundle flag to NativeScript
CLI commands:
- tns build android --bundle
- tns build ios --bundle
- tns run android --bundle
- tns run ios –bundle
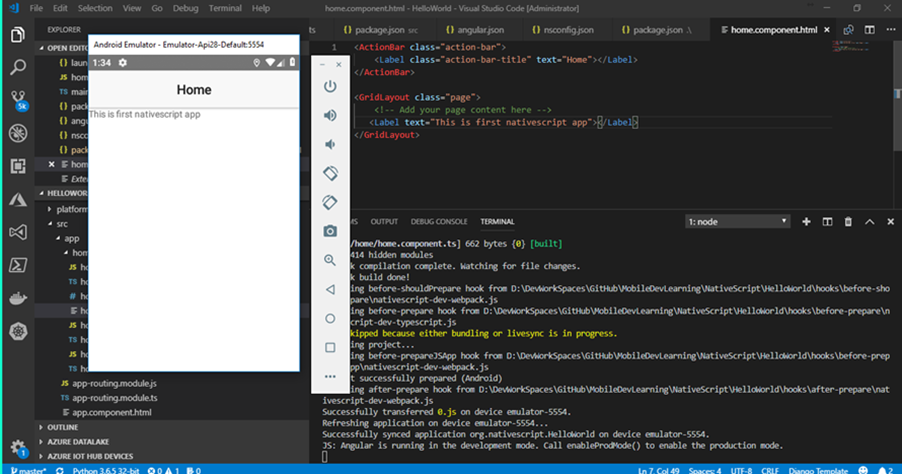
Run the command “tns run android –bundle” to test your first application in the emulator.
It is all done with creating a simple application in using the NativeScript.
Thursday, December 13, 2018
Containerizing a .NET application
From Wikipedia:
Docker is a computer program that performs operating-system-level virtualization, also known as "containerization". It was first released in 2013 and is developed by Docker, Inc.
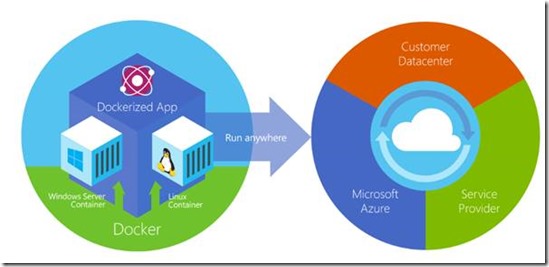
Docker is used to run software packages called "containers". Containers are isolated from each other and bundle their own application, tools, libraries and configuration files; they can communicate with each other through well-defined channels. All containers are run by a single operating system kernel and are thus more lightweight than virtual machines. Containers are created from "images" that specify their precise contents. Images are often created by combining and modifying standard images downloaded from public repositories.
Unification of container technology
1. A set of command-line tools to work with containers
2. A unified way to build Container images
3. A unified way of maintaining images in a registry
4. A daemon process that manages the images & networking on a host machine
What Is a Container?
A container is an isolated, resource controlled, and portable operating environment. A container provides a place where an application can run without affecting the rest of the system and without the system affecting the application.
If you were inside a container, it looks very much like you are inside a freshly installed physical computer or a virtual machine.
Containers are compared to virtual machines, but they are completely different technology.
Below are the benefits of containers over Virtual machines:
- Containers provide the isolation of a virtual machine with the lightweight process. Container provides almost the same level of isolation as you see in a virtual machine but is very lightweight in terms of overhead and start-up time.
- You can see inside a container and also make changes to it but in case of Virtual machines you have to first start the VM to the Virtual machine architecture and data. You can even make changes in your container, and then the isolation will ensure that nobody else but you can see the changes that you've made.
- The container will enable you to fully utilize the host machine resources e.g. CPU, memory, disk, and networking.
- Containers does not pre-allocate any resources. It is very light weight comparable to a process. If you run multiple containers on the same host machine, then these are fully isolated from each other and the host.
At first look containers and Virtual machines look similar because both uses the hardware and the host operating system. You can run applications on the host operating system, and we can have virtual machines and Containers on the host as well.
Virtual machine has its own operating system and separate application on it. On another hand still have the hardware and, of course, the host operating system interact with the kernel which is responsible for interacting with the hardware handling scheduling of different processes and managing resources like virtual management and CPU cycles.
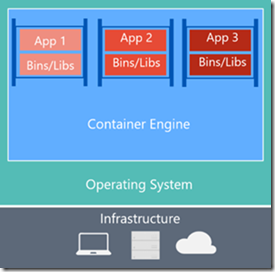
Containers let us to run our application by sharing the operating system kernel. This kernel has edit capabilities to create isolation between the different containers and never share anything else between the containers. Although Virtual machine provide isolation but using Hypervisor. Virtual machine has its own operating system and applications.
Setting up the Virtual machine operating system and application is a long task but setting up the containers using the images is a faster process. It just requires an image and configure your application on container using these predefined container images.
Container provide faster bootup time rather than the virtual machine. They are up and running within few seconds.
Containers
|
Virtual Machines
|
To create custom image for your application, we require docker tools. In this article, you will know that how to push your containerized application to the docker repository and to Azure App Service.
You can also deploy your application’s container from Visual Studio to Azure Container Registry, and then run it in App Service.
Now it is time to start creating a container image for ASP.NET MVC application using the windows containers.
Prerequisites
To create a .NET application container image, we require below prerequisites tools:- Sign up for a Docker Hub account
- Install Docker for Windows.
- Switch Docker to run Windows containers.
- Install Visual Studio 2017 with the ASP.NET and web development and Azure development workloads. If you've installed Visual Studio 2017 already:
o Install the latest updates in Visual Studio by clicking Help > Check for Updates.
o Add the workloads in Visual Studio by clicking Tools > Get Tools and FeaturesNote: In this article, Visual Studio 2019 Preview is used to create to the ASP.NET MVC application.
Create/Open an ASP.NET web app
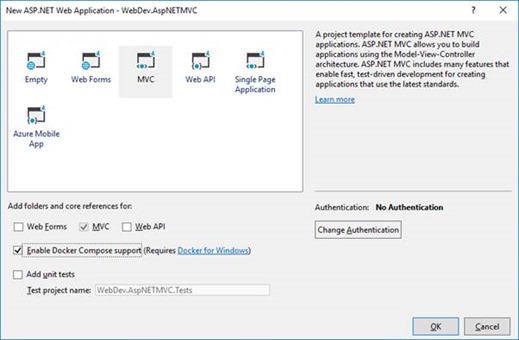
In Visual Studio, create a ASP.NET MVC project by selecting File > New > Project.
In the New Project dialog, select the template Visual C# > Web > ASP.NET Web Application (.NET Framework).
Define the solution and the project name then press create.
Select OK to continue.
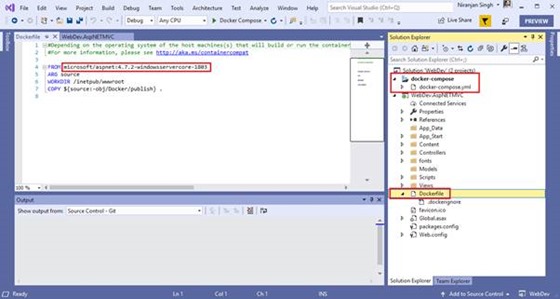
Once the project is setup then you will find Dockerfile under the project. It defines the structure of the container and which base image will be used to host your application.
Update the docker file with Azure App Server supported base image so the update docker file would be as below:
FROM microsoft/aspnet:4.7.1ARG source
WORKDIR /inetpub/wwwroot
COPY ${source:-obj/Docker/publish} .
Here is the list of supported base image.
Create and Publish to Docker Hub
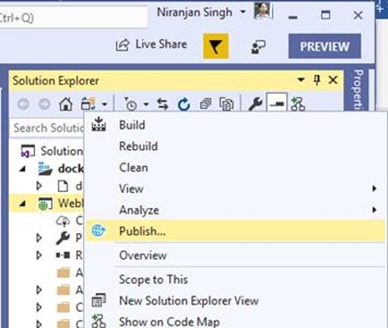
In the Solution Explorer, right-click the created project and select Publish.
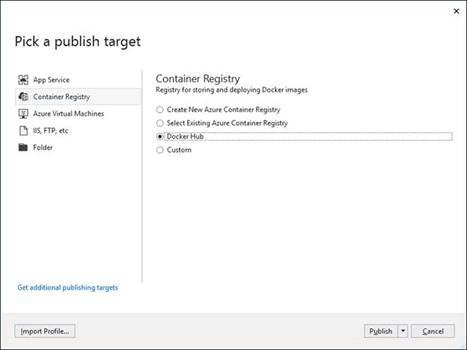
Select Container Registry > Docker Hub > Publish. There is another option also available. You can directly publish this application to Azure App Server or Azure Container registry. Although, we took the publish path from docker registry to Azure App service.
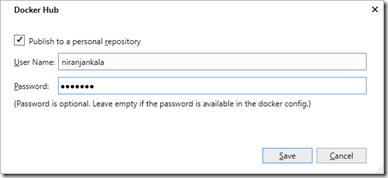
Enter your docker credentials:
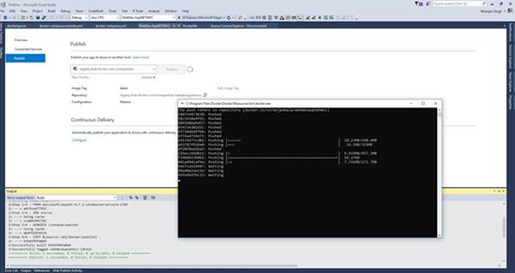
Now publish process create the docker image using the base image and bundle your application in to the image.
When process complete you will be able to see the pushed docker image in the docker registry at docker hub.
Now setup the Azure Container service to use this docker image.
Create a Windows container app
Sign in to the Azure portal at https://portal.azure.com with your account.- Choose Create a resource in the upper left-hand corner of the Azure portal.
- In the search box above the list of Azure Marketplace resources, search Containers and then select Web App for Containers.
- Provide an app name and let the default option create a new resource group selected, and click Windows in the OS box.
- By default, wizard Create an App Service plan but you can create your custom by clicking App Service plan/Location > Create new. Give the new plan a name, accept the defaults, and click OK.
- Now you will configure the container and provide the detail of the create docker image in the step. Click Configure container. In Image and optional tag, use the repository name you created in Publish to Docker Hub step, then click OK. In previous step I have create repository with name “niranjankala\webdevaspnetmvc” as you can see in above docker hub image.
There is an option for the Kubernetes but Kubernetes is only supported on Linux operating system-based applications. - Click Create and wait for Azure to create the required resources.
Once the deployment complete you are ready to browse your containerized application. Now browse “webdevaspnetmvc.azuresites.net” or whatever application name you chosen during the web app service setup process.
Tuesday, December 4, 2018
Visual Studio 2019 with more developer productive features
Microsoft announced the availability of Visual Studio 2019 Preview 1 in the Microsoft Connect(); 2018 keynote. Download is now available for both Windows and Mac platform.
What New Features bring with Visual Studio 2019
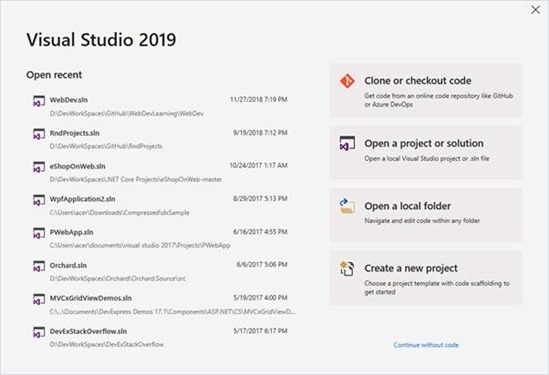
Visual Studio 2019 launched with faster tooling, enhanced collaboration and productivity improvements. The public preview 1 includes a new start window experience to get developers into their code faster, a new search experience, increased coding space smarter debugging, AI-powered assistance with IntelliCode, increased refactoring capabilities, and built-in access to Visual Studio Live Share.
Below the list of improved features
Source: Visual Studio 2019 Preview
Intellicode and One-click Code Cleanup
Drive code maintainability and fix warnings and suggestions with one-click code clean up, and use more refactoring capabilities than ever.
Live Share and PR Experience
you can collaborate in real-time whether your team members are working from home or across the world. Live Share installs by default and supports all projects, app types, and languages.
When you’re ready to check in your code, try the new pull request (PR) experience. It lets you and your team quickly review code (even run the app and debug!) from Azure Repos directly in the IDE.
Search Window and Snapshot Debugger
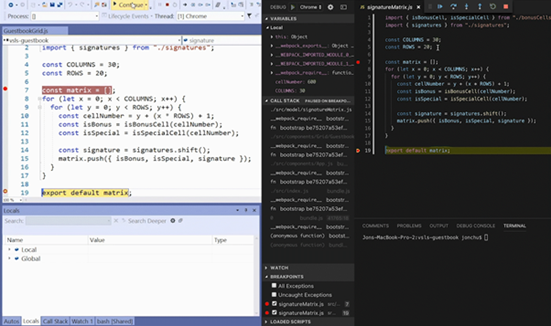
Improved stepping performance and support for large C++ apps enhance your debugging experience. New search capabilities in Autos, Locals, and Watch windows help you find objects or values, or visualize Collections.
With new app targets for Snapshot Debugger, you can debug issues in a production environment without impacting performance or stability. It takes a snapshot of the environment so you can inspect objects and call stacks.
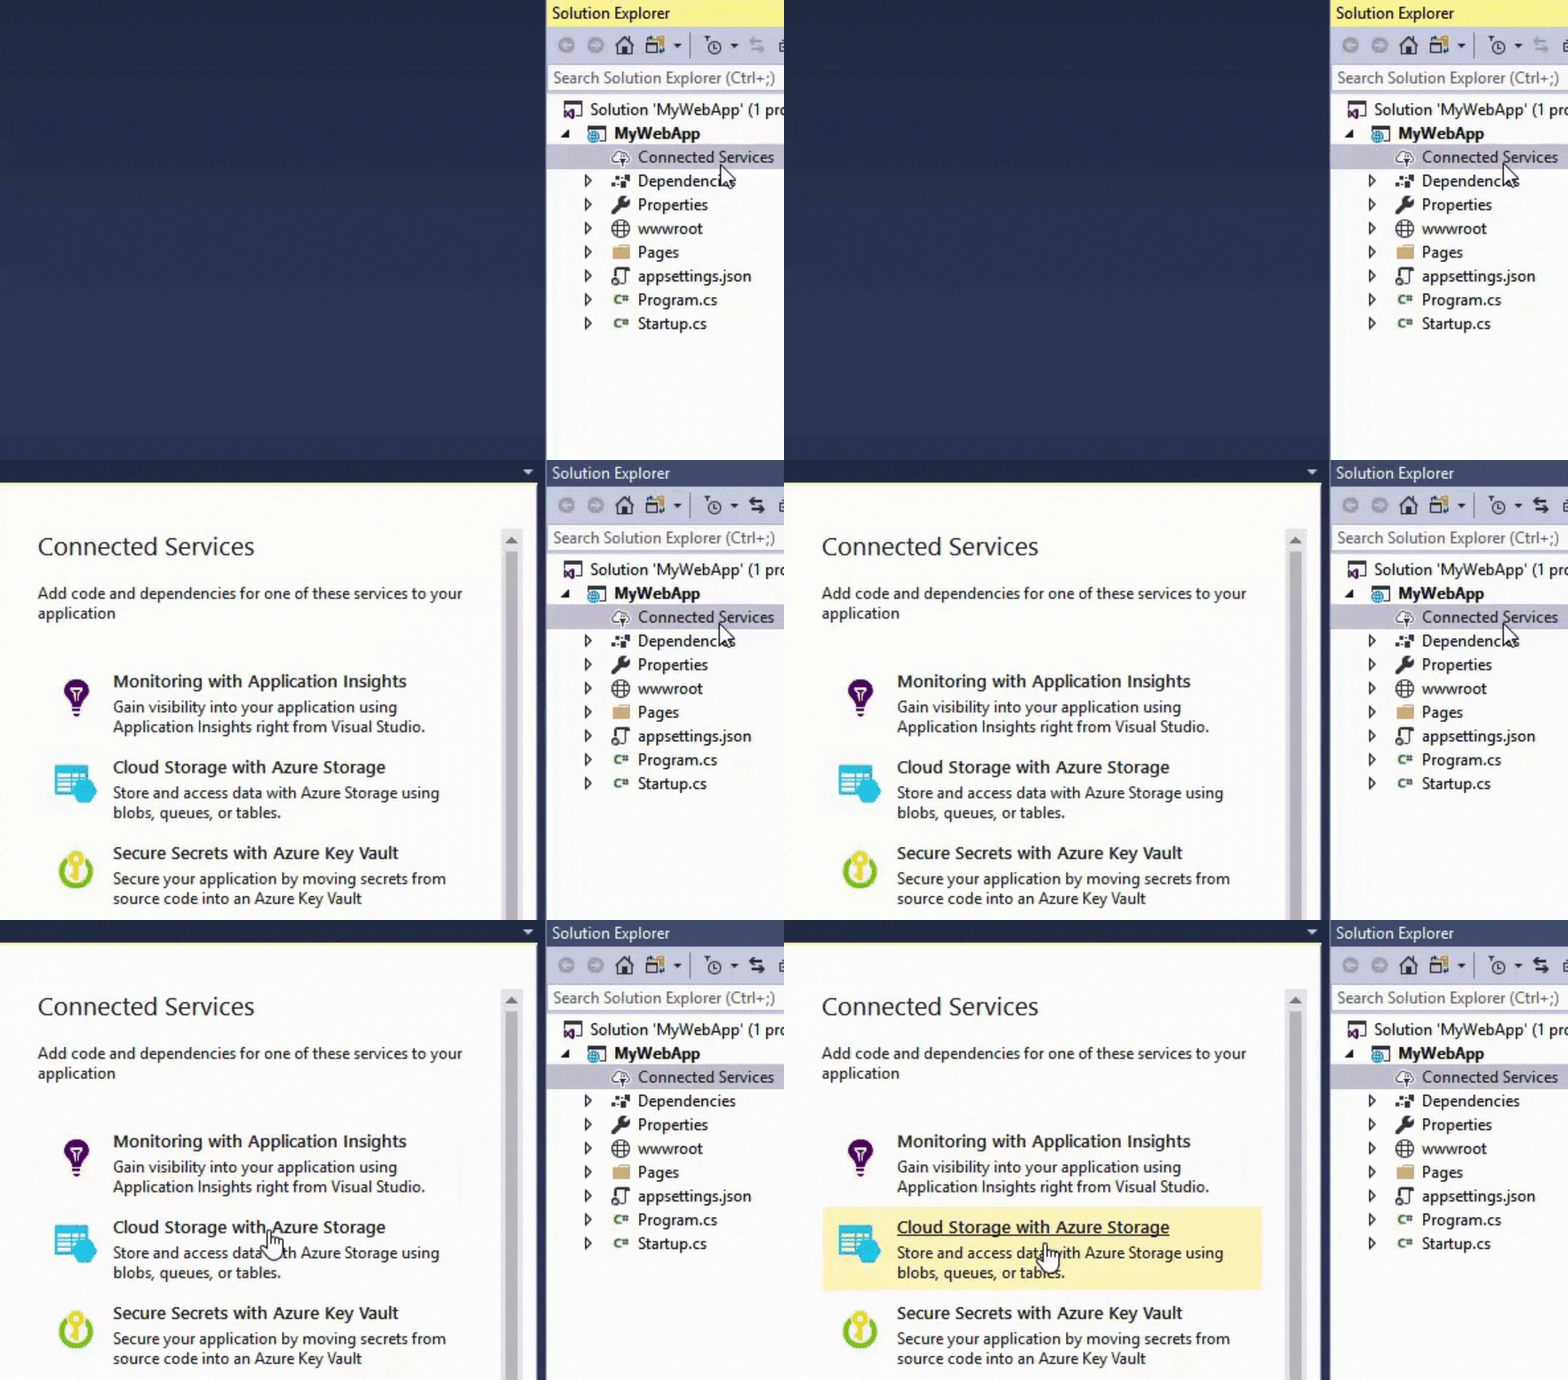
Connected Services and Azure App Services
Configure your applications to use Azure services with just a few clicks. You can create new instances of Azure Storage, Key Vault, Cognitive Services, and more without ever leaving the IDE.
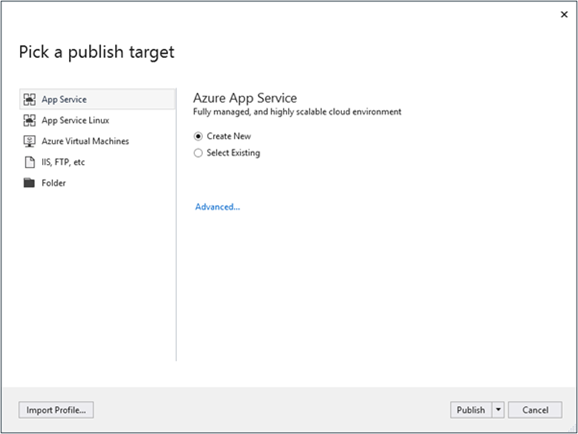
Start developing your code locally and offline until you are ready to deploy. Then publish directly to Azure in minutes, not hours, targeting virtual machines, containers, or Azure App Service.
.NET Core 3 and C++ Improvements
Visual Studio 2019 gives your current projects the full-fledged support they need across any platform including desktop, web, mobile, and games. It also supports .NET Core 3, one of the fastest frameworks on the planet.
With support for Linux targeting, and CMake and ClangFormat support, Visual Studio 2019 is the most complete IDE for C++ developers. C# and F# developers can build native cross-platform apps with Xamarin.
Happy Coding